Reminders for Activities, will only pop-up when you are logged into your browser. Not every user might be logged in every day, in which case you might want to set up email reminders to be send to a user for Tasks or Events.
We can send email reminder by creating Workflow Rule or Process Builder. In this post, I would like cover Process Builder. Because, we can not create Workflow Rule in Professional Edition as it is a limitation. However, In Professional Edition Salesforce provided another option called "Process Builder" which is more efficient than "Workflow Rule".
Please follow below steps to achieve the requirement.
We should have "Email Template" and "Email Alert" ready before creating Process Builder.
Email Template:
1. Your Name | Communication Templates | Email Templates and click on "New Template" button.

2. Select type of Email Template and click on Next button.

3. Enter properties of the Email Template as shown below. Please make sure "Available For Use" field is checked and click on Save button. After save, click on "Edit Template" button.

4. Enter body of the Email Template as shown in below screen shot and click on Save button.

Code Snippet:
<messaging:emailTemplate subject="Salesforce Event Reminder !" recipientType="User" relatedToType="Event">
<messaging:HTMLEmailBody >
Hi {!relatedTo.Owner.Name}, <br/><br/>
Gentle reminder ! <br/><br/>
You have scheduled event and below are the event details. <br/><br/>
Name: {!relatedTo.Subject} <br/>
Start Date/Time: <apex:outputLabel value="Start Date/Time: " for="sDateTime"/><apex:outputField value="{!RelatedTo.StartDateTime}" id="sDateTime"/> <br/>
End Date/Time: <apex:outputLabel value="Start Date/Time: " for="eDateTime"/><apex:outputField value="{!RelatedTo.EndDateTime}" id="eDateTime"/> <br/><br/>
Thank you, <br/>
Salesforce.com
</messaging:HTMLEmailBody >
</messaging:emailTemplate>
5. Yes, We have completed our Email Template and below is the preview of Email Template.
 Note: Merge fields are not available in preview of visualforce email template.
Email Alert:
1. Your Name | Setup | Create | Workflow & Approvals | Email Alert and click on "New Email Alert" button.
 2. Fill all the fields as shown below screen shot and click on Save button.
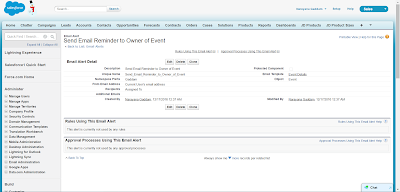
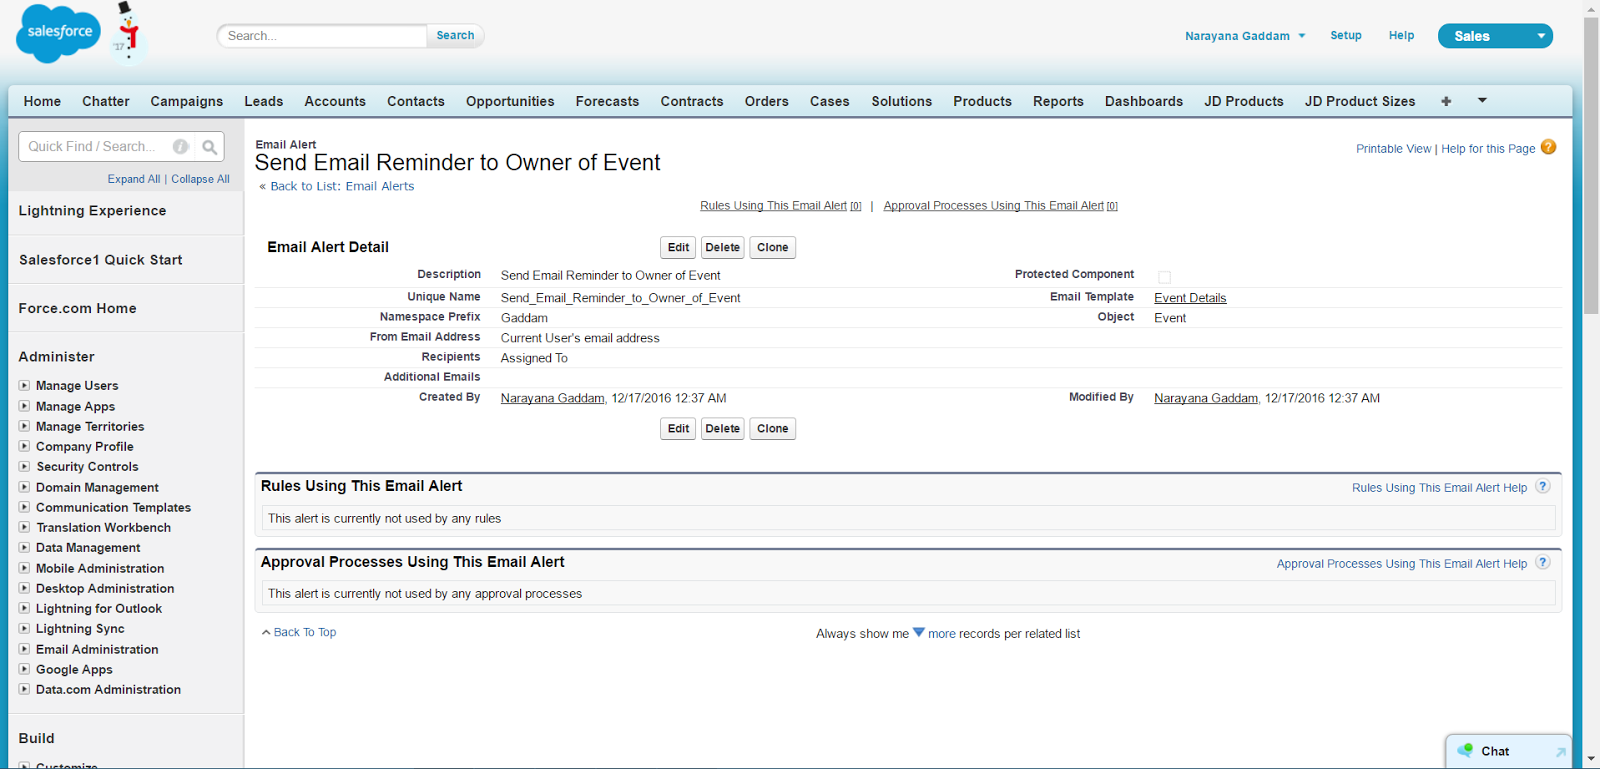
 3. Below is preview of Email Alert.
Process Builder:
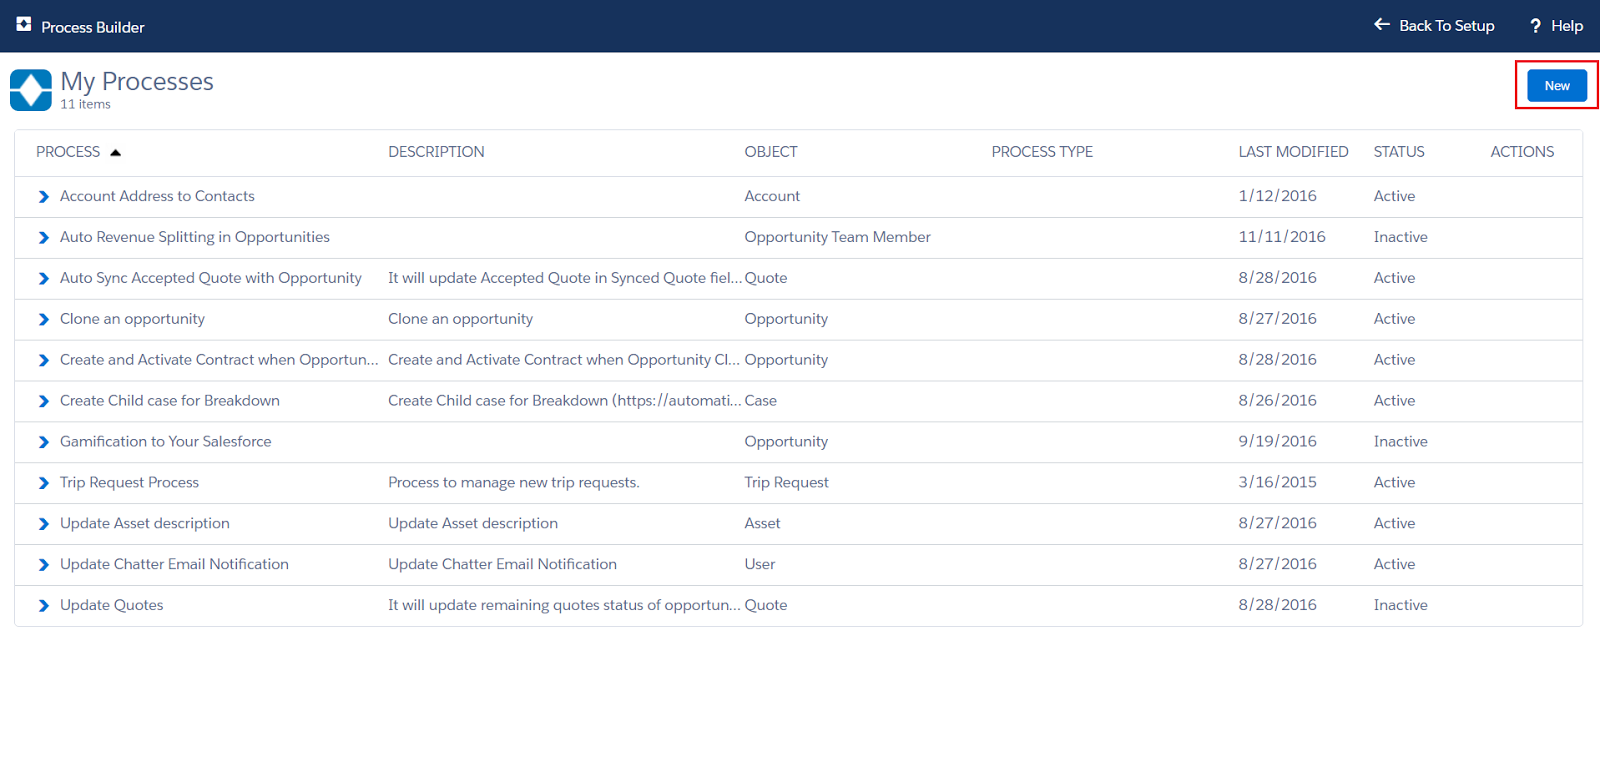
1. Your Name | Setup | Create | Workflow & Approvals | Process Builder and click on New button from top right corner as shown below.
 2. Enter name in Process Name then API Name field would populate automatically, enter description optionally and hit the Save button.
 3. Click on "Add Object" option, enter Event(i.e. name of the object) and select the criteria as shown below screen shot.
 4. Click on Criteria, enter name and rule of the criteria, other options as shown below.
 5. Scroll down and check "Advanced" section check box as well and hit the Save button.
 6. Click on "Set Schedule" option, set time for reminder and hit the save button.
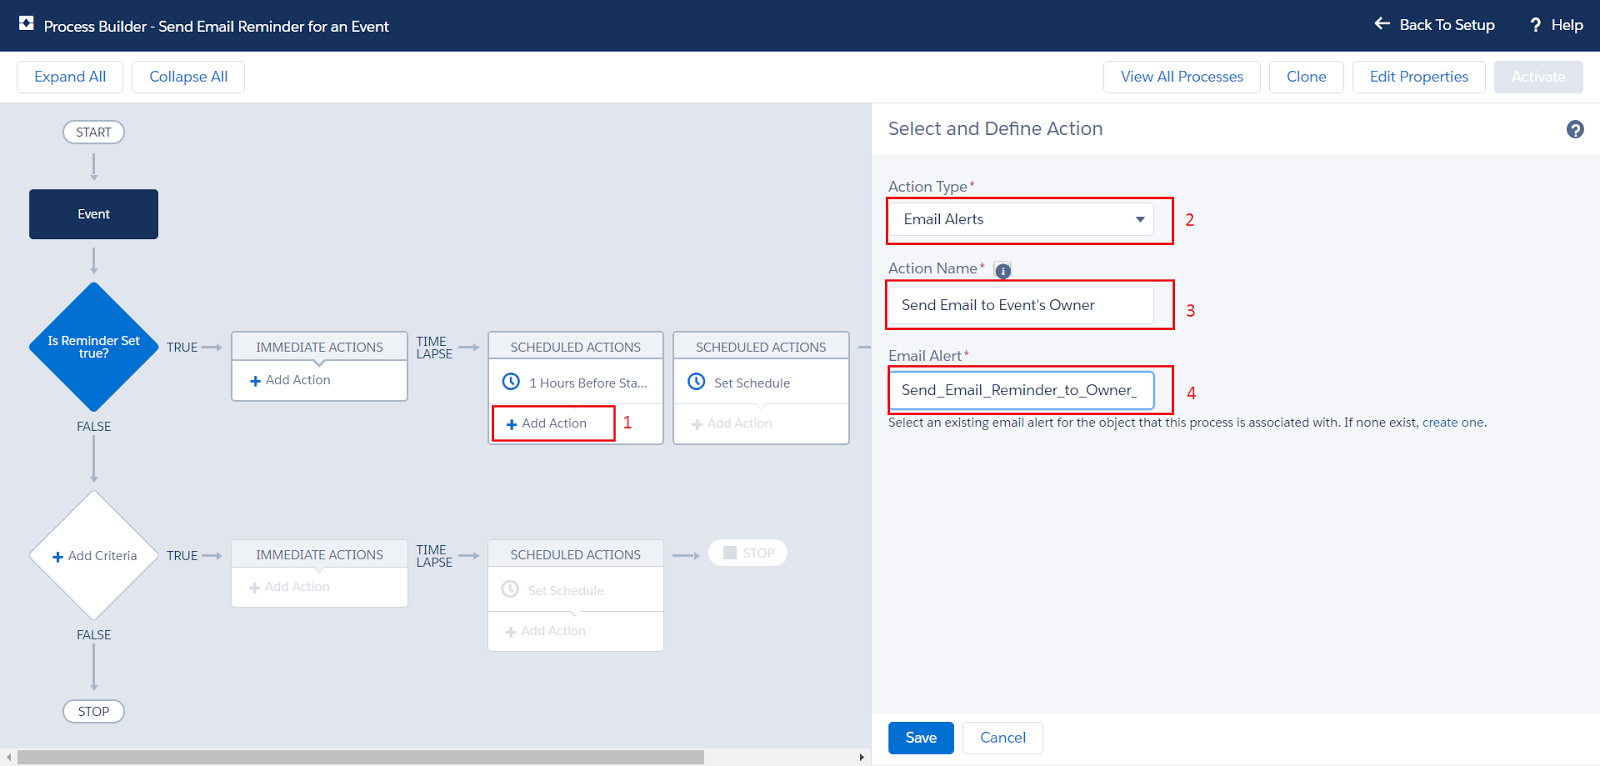
 7. Click on "Add Action", select "Email Alerts" from Action Type, enter Action Name and start enter name of the email alert so that template would be populate and select it. Finally, click on Save button.

That's all. Now onwards, whenever an event has scheduled then email reminder notification will be sent to owner of event before 1 hours event occurs.
Thank you for referring the post
We can send email reminder by creating Workflow Rule or Process Builder. In this post, I would like cover Process Builder. Because, we can not create Workflow Rule in Professional Edition as it is a limitation. However, In Professional Edition Salesforce provided another option called "Process Builder" which is more efficient than "Workflow Rule".
Please follow below steps to achieve the requirement.
We should have "Email Template" and "Email Alert" ready before creating Process Builder.
Email Template:
1. Your Name | Communication Templates | Email Templates and click on "New Template" button.

2. Select type of Email Template and click on Next button.


Code Snippet:
<messaging:emailTemplate subject="Salesforce Event Reminder !" recipientType="User" relatedToType="Event">
<messaging:HTMLEmailBody >
Hi {!relatedTo.Owner.Name}, <br/><br/>
Gentle reminder ! <br/><br/>
You have scheduled event and below are the event details. <br/><br/>
Name: {!relatedTo.Subject} <br/>
Start Date/Time: <apex:outputLabel value="Start Date/Time: " for="sDateTime"/><apex:outputField value="{!RelatedTo.StartDateTime}" id="sDateTime"/> <br/>
End Date/Time: <apex:outputLabel value="Start Date/Time: " for="eDateTime"/><apex:outputField value="{!RelatedTo.EndDateTime}" id="eDateTime"/> <br/><br/>
Thank you, <br/>
Salesforce.com
</messaging:HTMLEmailBody >
</messaging:emailTemplate>

Email Alert:
1. Your Name | Setup | Create | Workflow & Approvals | Email Alert and click on "New Email Alert" button.


Process Builder:
1. Your Name | Setup | Create | Workflow & Approvals | Process Builder and click on New button from top right corner as shown below.


That's all. Now onwards, whenever an event has scheduled then email reminder notification will be sent to owner of event before 1 hours event occurs.
Thank you for referring the post


